Pages

Showing posts with label 3M command strips. Show all posts

Thursday, November 15, 2012

A Quick Kitchen Update

We took a trip to Chicago last week and had a great time up north. They don't call it the windy city for nothing! But we had a fantastic time. It was a well-deserved break. :)

While we were there, we went to Ikea and a few other places for inspiration. There are these two spots in our kitchen that have looked lonely since we painted the walls. This trip has at least fixed one spot.

kitchen2 

Everything in this spot wasn't all bought at the same time... Most of them we've picked up in the past couple of months. John did most of the work here. I am mostly in charge of the finishing touches and the shake and bake helper. [a.k.a. I help hold stuff up, and the clean up crew, photographer] and like John calls me the 'enjoyer' of it all. LOL

red16 

red15
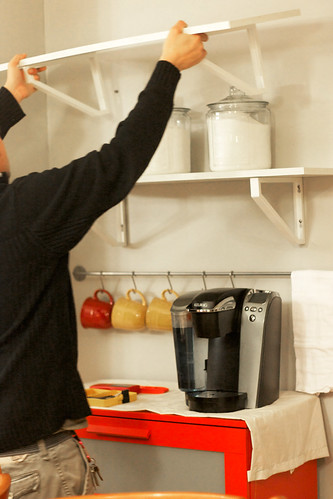
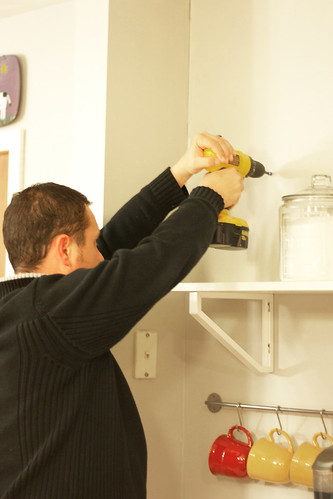
Don't try this at home! Make sure that where you work is free and clear of stuff that could fall or break! We put the jars on the one shelf to test how it will hold up to the weight we are putting on it. We did pick up metal brackets to install in the center of each shelf if it sagged any but it's holding up just fine.
john

Honestly, it is a team effort. We both have roles we play in the DIY messes we get ourselves into. My craft room hasn't been looking too nice since I started the kitchen project. There's always a crafty project being made in there it seems like, but I can't complain... There is not a better feeling than seeing a project or projects to the finish. John and I have done quite a few and when the results surpass our expectations, it feels even better. We love a good DIY challenge.

red9 

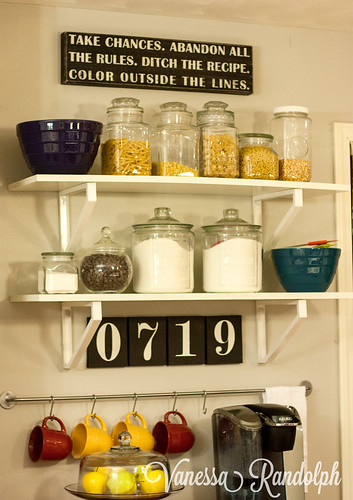
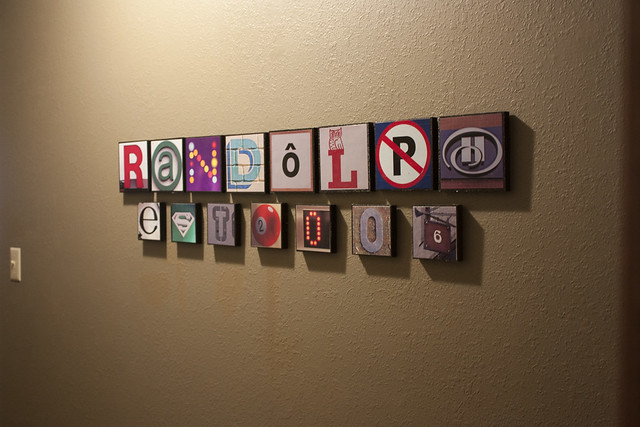
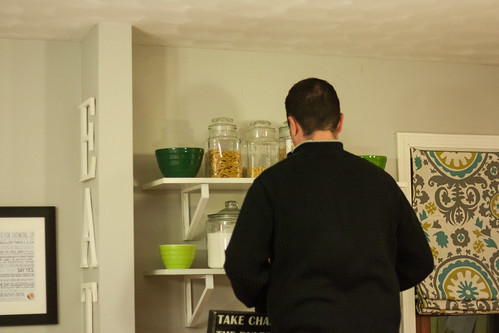
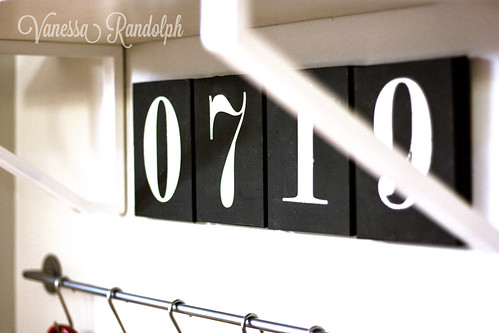
And here it is [photo above]. It took less than a week to put this whole thing together. But today, I was looking at the one empty spot under the first shelf and added the blocks with the numbers on them. This project cost me $0. I had all the supplies and it took no time to make.
red10 

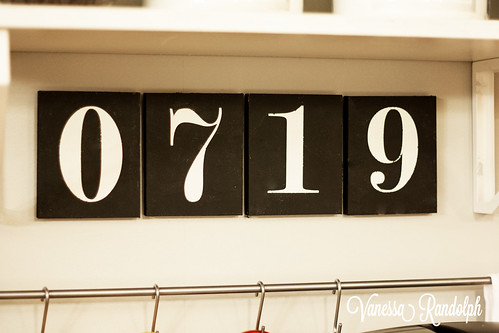
The blocks are about 5.5 inches tall and approximately 4 inches wide. They are leftover plywood blocks from when John built floating shelves for our old house, and I got lucky because all four happened to be the same exact size! Then I got out some paint out of my stash, did a little sanding and my blocks were ready for the vinyl stencils I cut with my Silhouette and went to town. Fifteen minutes later, they were ready to hang! I used Command strips to mount them on the wall. After patching the 40,000 screw holes I found while painting the kitchen, I lost all desire to drill any holes on any of my walls. So no matter how expensive, I get the 3M stuff when I hang decor on the wall because they do my walls no harm. They also save me an extra step [patching holes] when I decide to change things up. :)

I didn't make the sign at the very top. John got that for me. And I am pretty sure he paid too much for it. LOL He is a sweetie and he will do anything for me except stencil or paint. He hates painting.
 
red11
NOTE: Remember to always use your level to make sure your wall hangings aren't mounted crooked.

Here's more photos...

red6 

red8 

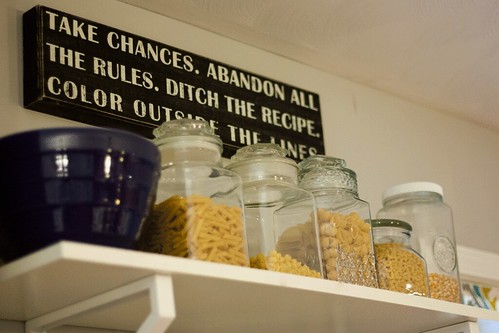
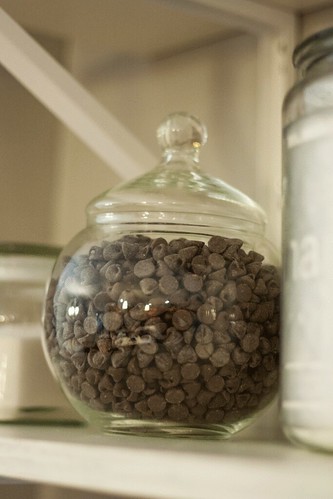
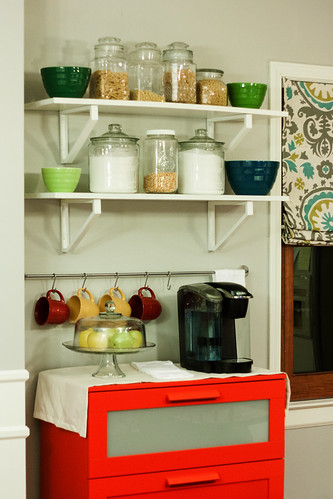
I love how everything can be seen and be pretty at the same time. I love clear glass jars/containers. They make every day stuff look nice. They make me smile. Below is our happy red buy from our trip that is now home to our K-cups and loose stuff that used to just lay in random drawers and places in our kitchen. Now they have a home. Everything is in its place and now that our Keurig is off the counter, I will have more room to work.

red5 

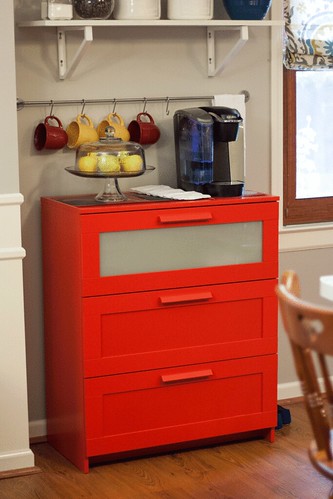
I love how cheery these cups are, too! They came with the new set of dishes we just recently got to replace the old Pfaltzgraff set we've had for a long time.

red2 

And here she is all done! I may change up a few things or add a thing or two in the next couple of weeks but she is done. :)

red17 


'Til next time,

_signature
Pin It!

Monday, September 3, 2012

John's Music Room

John and I have had an easy [but busy at the same time] summer. We have been working on the new house... Putting our mark on it, making it ours. We aren't by all means, done yet but we are definitely getting there. 

Slowly but surely. 

This summer, we put together my craft room and his music room/office. :) His music room was pretty much all me except anything heavy that needed to be picked up and hung or anything that required to be cut by a saw. 

Okay so here are photos.


musicrm7

The desk [photo above] used to be in my old craft room. He has been obssessed with it since I took it home from Staples. So since he totally pulled the best husband ever thing and built me that really awesome desk here and here, I gave my desk to him, painted his walls, sewed curtains and let him pick out the fabric and totally prettied up his music room... because awesome husbands deserve their own awesome, cozy space! I don't know about you other women out there but I am married to the best enabler in all of the land so when he wants something like a cool room, I give it to him.

musicrm2

We have had a lot of stuff going on this weekend home decorating so excuse the screw drivers and markers laying around. I did sew those curtains. They are just simple back tab panels. The fabric is Premier Prints Barber in black and lipstick and I got here. The lamp I got for a buck at the thrift store. Spruced it up with spray paint is all I did to it.


musicrm4 

This corner, I am still trying to figure out why he is stuffing everything here from his guitars, to the guitar cases, his amp and pedals. The pedals kind of moved under the desk this weekend because he's been rocking in here. The chair is a gift from Betty and the Beatles poster, a nifty find by yours truly.

musicrm1 

And this, this is what brings the cool factor in this room. This is a Slingerland snare drum that's been sitting in our garage for a long long time. I found it sitting in its lonesome as we were moving John's tools out to the new garage. And told John to make it into a lamp! A week of searching for a lamp kit that suited him, VOILA!!! A snare drum light. I have left it all untouched for a while because I wasn't sure if it was gonna stay hanging and it has so maybe next week, I'm gonna have to device a plan to conceal the cords.

Here's a quick lowdown on how we converted this thing into a lamp. I don't have photos to show you but it was really easy [given that we have every tool known to mankind and a lot of scrap wood from the construction of my desk]. First, John put the drum back together, we had to go to Guitar Center to get lug screws, etc. Second, he put a piece of either 1x2 or 1x4 [we experimented] across the drum to hold the light kit and bulb in place, then we dug into my gardening supplies and found the [hanging basket] chains that we used to hang the light up. A word of caution though, if you are using a real drum like we did, make sure that your mounting hardware can hold the weight of it and make sure you screw your hook into a stud on the ceiling. Then he drilled an inch or an inch and a half hole into the 1x2 or 1x4 to accommodate the light kit. String the cord onto the chain. Put a bulb in. I used a flood light for ours because it is brighter and gives out a spotlight-ish effect, it just adds a little bit of interest into what used to be an empty corner in his room. :)
 
There's more to come. I still have a full wall behind the drum set that I need to dress up! :)

But before I go, here's a couple of photos of our hallway. I've been working on it for a couple of weeks.

hallway4 

I'm crazy inlove with my husband, I could plaster his name all over the house! lol The stuff on the wall is the beginnings of a photo wall I'm trying to build. For all you know, it may be John's name in different languages! Haha!
hallway2

And this is just one of those crazy ideas I had. I got the photos from Flickr. This was fun to make. No walls were harmed in the making of this project. I used 3M Command strips to hang each piece so I didn't have to make holes in the wall. 

So that's it for now. :) See you all next time!


_signature
Pin It!
Related Posts Plugin for WordPress, Blogger...